Probably not in this world no ITshnika who has not heard of the release of Windows 7, many have even managed to set it as your home Windows. I myself am in the process of installation - recently bought a new hard drive, 2 cooler for the body and found I needed the distribution of Windows 7. What is missing is time to take off everything and work, but to concentrate once and get away with cumbersome and dreaded Vista. So for those who are still in, as I propose to put in thought a motivational wallpaper in the style of Windows 7, but instead to look for them, we will try to draw them yourself in a photo editor Photoshop (English version).
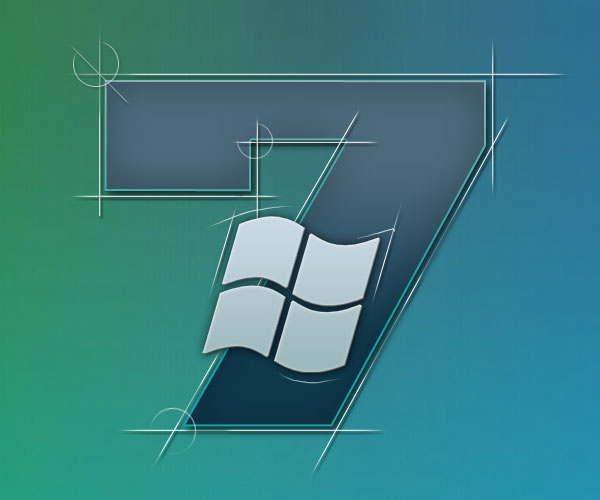
So in this tutorial I'll show you how to make a beautiful wallpaper of Windows 7 . Here we go. To begin with, by the way, I propose to evaluate the final result of our work:
Create a new file (File> New) size of 1920px to 1200px, in the "Background Contents" select White. Then knock out the tool Rectangle Tool (U) and draw a rectangle. Fill the parameter is set to 0% and go into the settings of the layer (Layer Style), then proceed Styles> Gradient Overlay.

Select the Gradient Editor by clicking on the gradient, pay attention to the colors used codes:

The result will be something like:

Use this same technique to create another layer of background. Again, draw a rectangle on the screen. For him, just expose the Fill to 0% and go into the settings of the layer (Layer Style), to the point of Gradient Overlay and choose a different color.

Should have:

Then again, select the tool Rectangle Tool (U), select a rectangle slightly smaller, and fill our new gradient background. The newly set to Fill the layer to 0%, go to the settings of the layer and go to Gradient Overlay.

Total we have the background wallpaper in the style of Windows 7

Now we make from all walks of one image, it will be the background. Select them all (hold down the Ctrl key and click on each layer) and press Ctrl + E, or click the right mouse button and click on "Merge Layers". We had a merged layer. Next, make a copy and go to Filter> Render> Lighting Effects.


We set up the layer Blend Mode to Mode Screen.

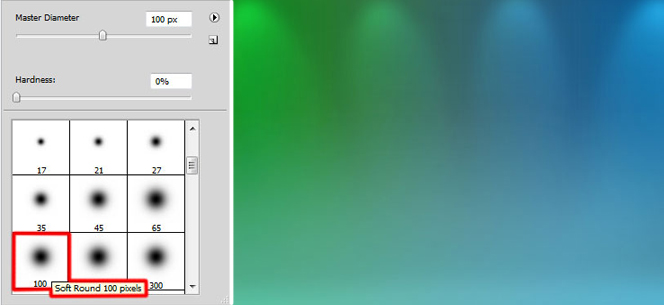
As well as set up in the box Blur Filter> Blur> Gaussian blur.

Create a new layer and using a brush paint the bottom of the layer. Brush Color: R: 5, G: 80, B: 210.

Add a Layer Mask by clicking on the button Add Layer Mask, which is located at the bottom of the Layers palette.Then use a brush of black color with a value of Opacity - 30%. She paints a vivid blue background on the relevant parts so that it does not stand out. The result should look like this:

Set the Blend Mode is set to Luminocity.

Create a new layer. Choosing the same brush, but white with the Opacity to 10%, which would be "light" bottom layer.
Set the Blend Mode to the value of Overlay.

Now the first part of a lesson on how to create the Windows 7 wallpaper for your desktop can be considered complete - will continue to add the logo of the system.


0 comments:
Post a Comment